AfterShip Pixel
AfterShip Pixel is a powerful tool for optimizing marketing campaigns and conducting analytics. It was built with a strong focus on data science, and the AfterShip Pixel Web SDK and API make integration easy.
Quick Start
1. Get Started
Follow these steps to begin using AfterShip Pixel APIs:
- Log in to your AfterShip account.
- Obtain your API credentials.
- Start integrating the APIs into your system.
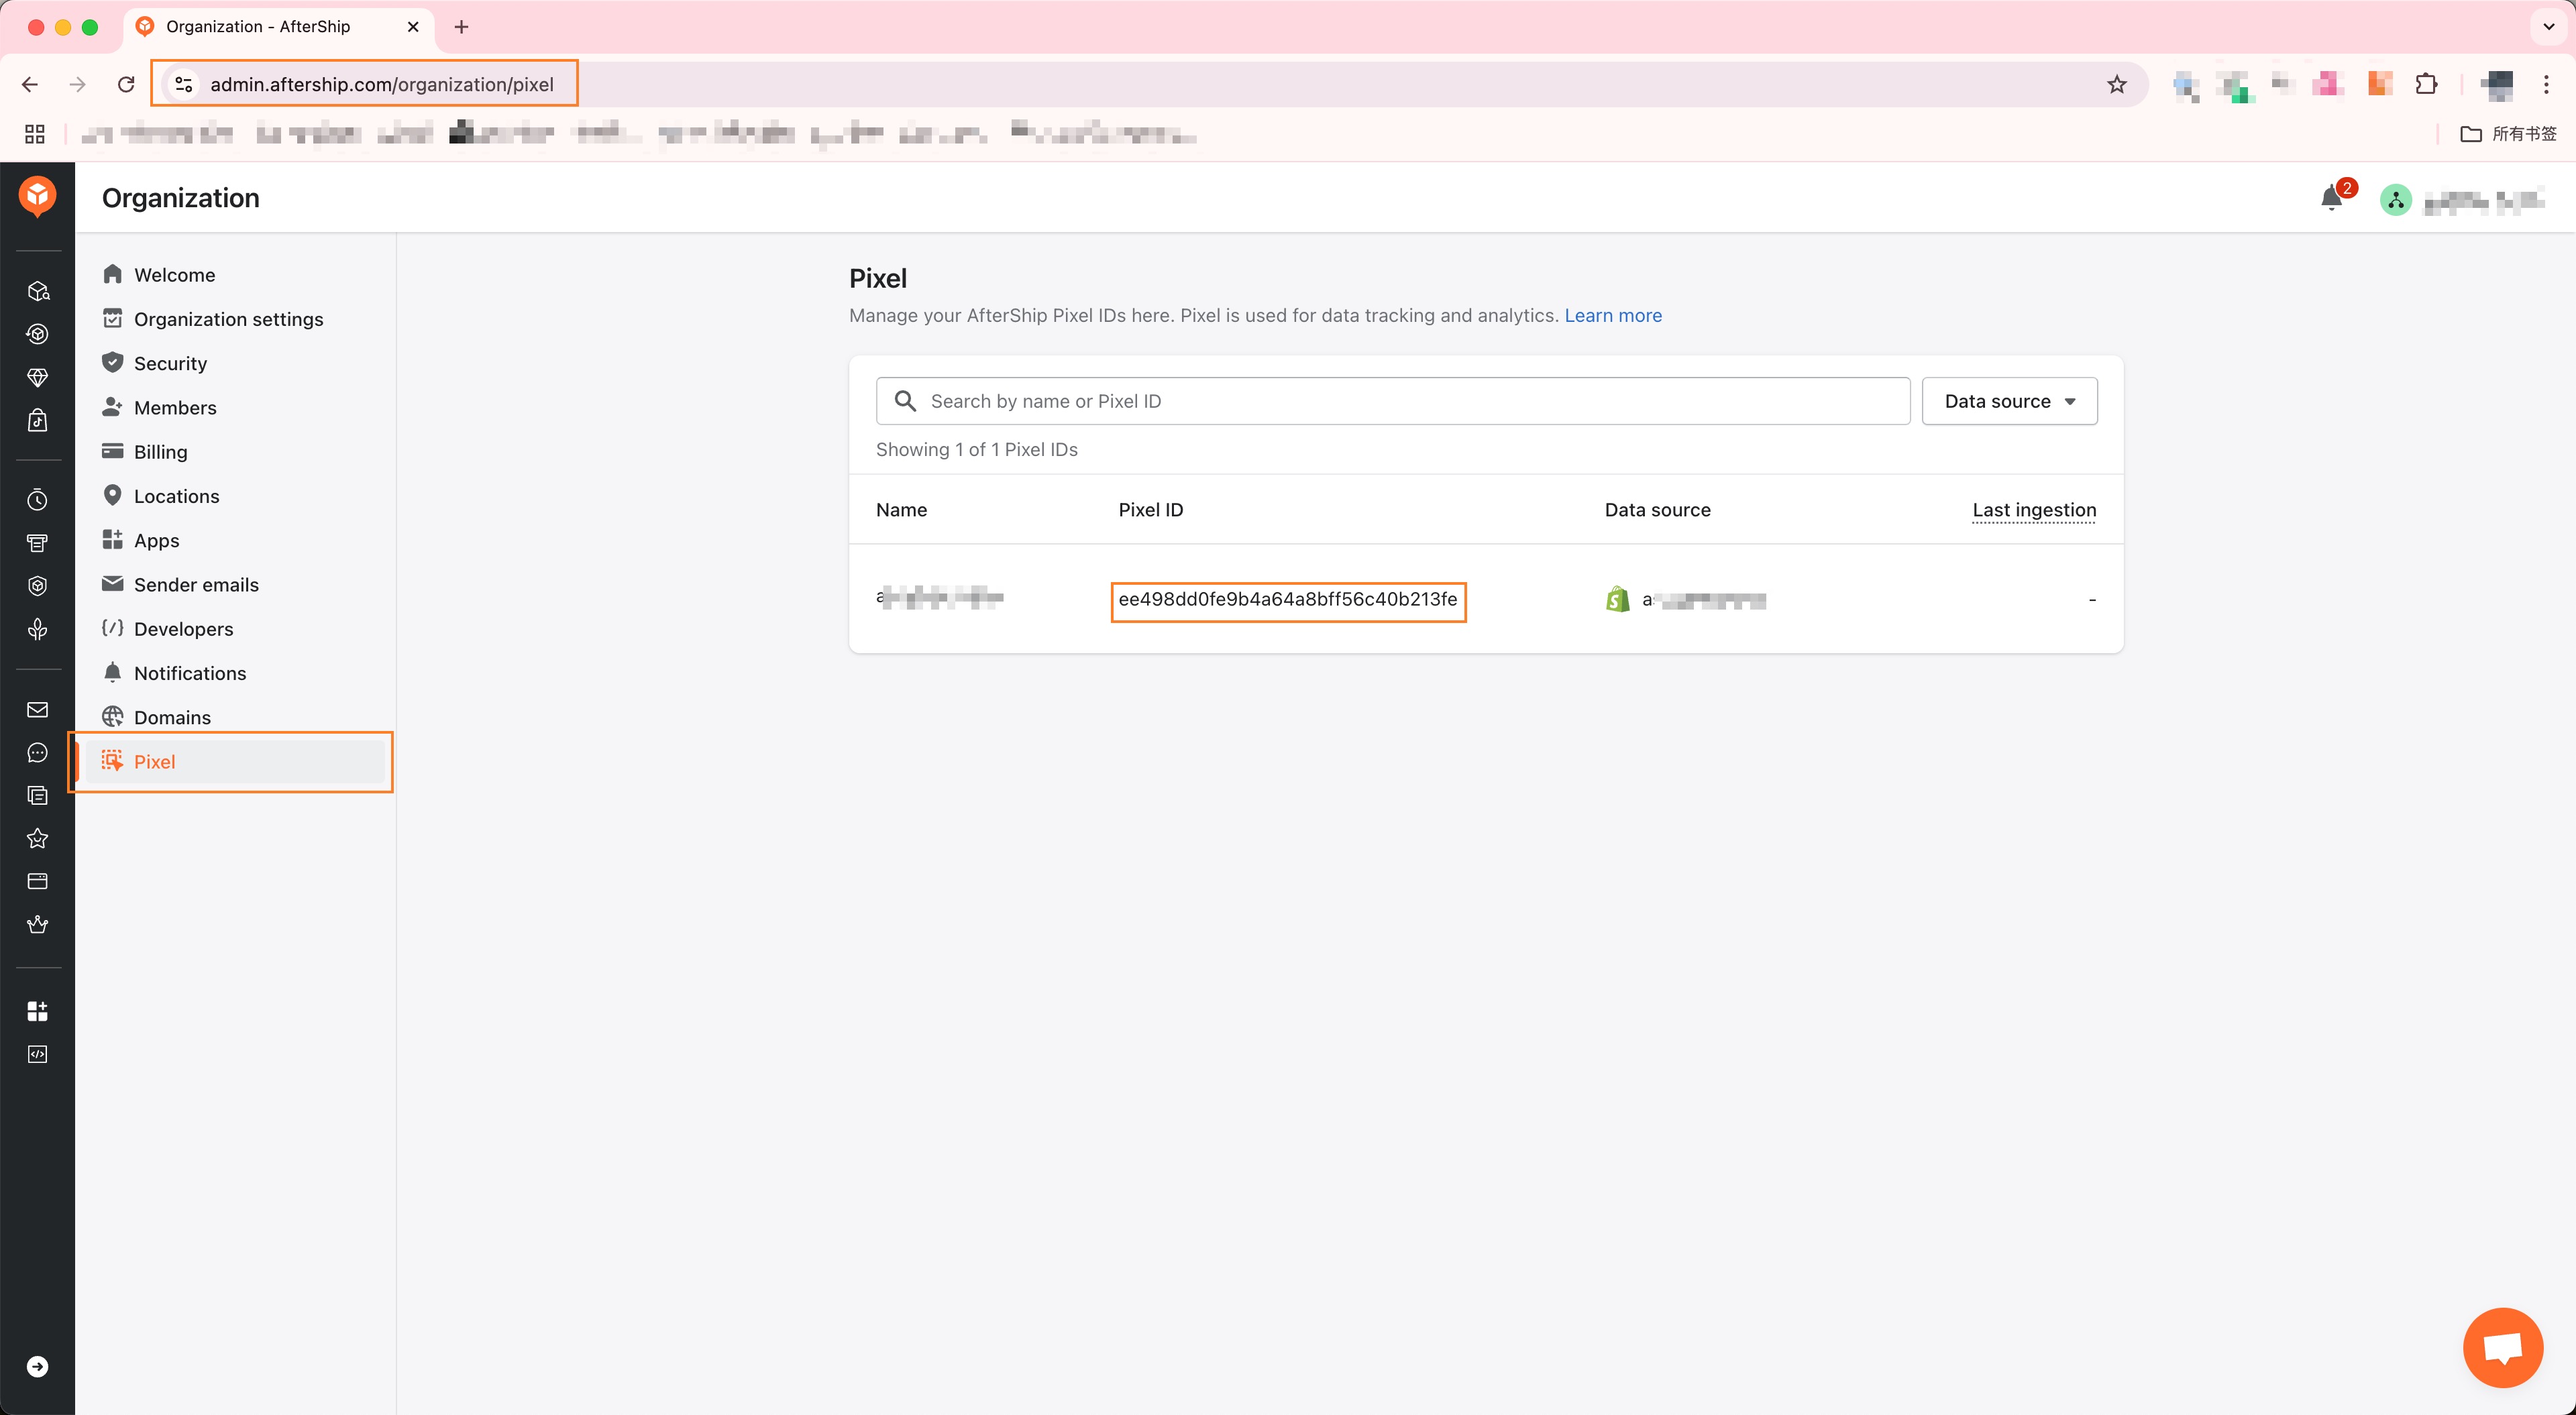
1.1 Obtaining an AfterShip Pixel ID
The AfterShip Pixel ID is a unique 32-character string that represents your store. Getting the Pixel ID is very simple. Visit the AfterShip Pixel admin system to easily retrieve the Pixel ID of your store. The Pixel ID is generated when the store installs the AfterShip app. As shown below, you can find the corresponding Pixel ID on this page.
1.2 Installation
AfterShip offers two commonly used integration methods for web development. Depending on how your store is set up, you can choose either method to integrate AfterShip Pixel into your store quickly.
Method 1: Using npm or yarn (Recommend)
We recommend using npm or yarn for installation. These tools make development easier and allow you to take advantage of the rich ecosystem of JavaScript packages and tooling.
preparing...
Call ASPixel.init to complete the SDK initialization, allowing AfterShip Pixel to know the source of incoming events.
preparing...
Method 2: Adding the AfterShip Pixel Code Snippet
Alternatively, you can add the following snippet to your website's main template. This ensures it will be automatically included on every page of your website.
preparing...
💡We recommend adding the AfterShip Pixel code towards the bottom of your site's template. If you're using Google Analytics or other third-party services, you can place the AfterShip Pixel code either directly above or below those.
1.3 Reporting the First Event
The ASPixel.events.* function allows you to record any events and actions on your website. This method accepts a string for the event name and an optional dictionary of properties associated with the event.
💡The SDK sends the request upon calling ASPixel.events.*(). Before invoking this API function, ensure that your website complies with all relevant data privacy regulations (e.g., GDPR, CCPA, etc.).
Sample Usage
preparing...
1.4 Identifying Users
After initializing ASPixel, you can call ASPixel.identify() to identify individual users. This method accepts customerId, and all subsequent event reports will include this customerId.
Sample Usage
preparing...
After identifying the customer, it is also possible to reset the user by calling ASPixel.resetIdentity(). After calling this, all events will not carry the customer id.
Sample Usage
preparing...
1.5 Debugging the Events
The SDK offers an option to enable debug mode. When the debug mode is enabled, the SDK will not report events, and the related logs will be output to the browser's debug console.
The SDK provides a visualization module for event reporting. You can see the reported events here.
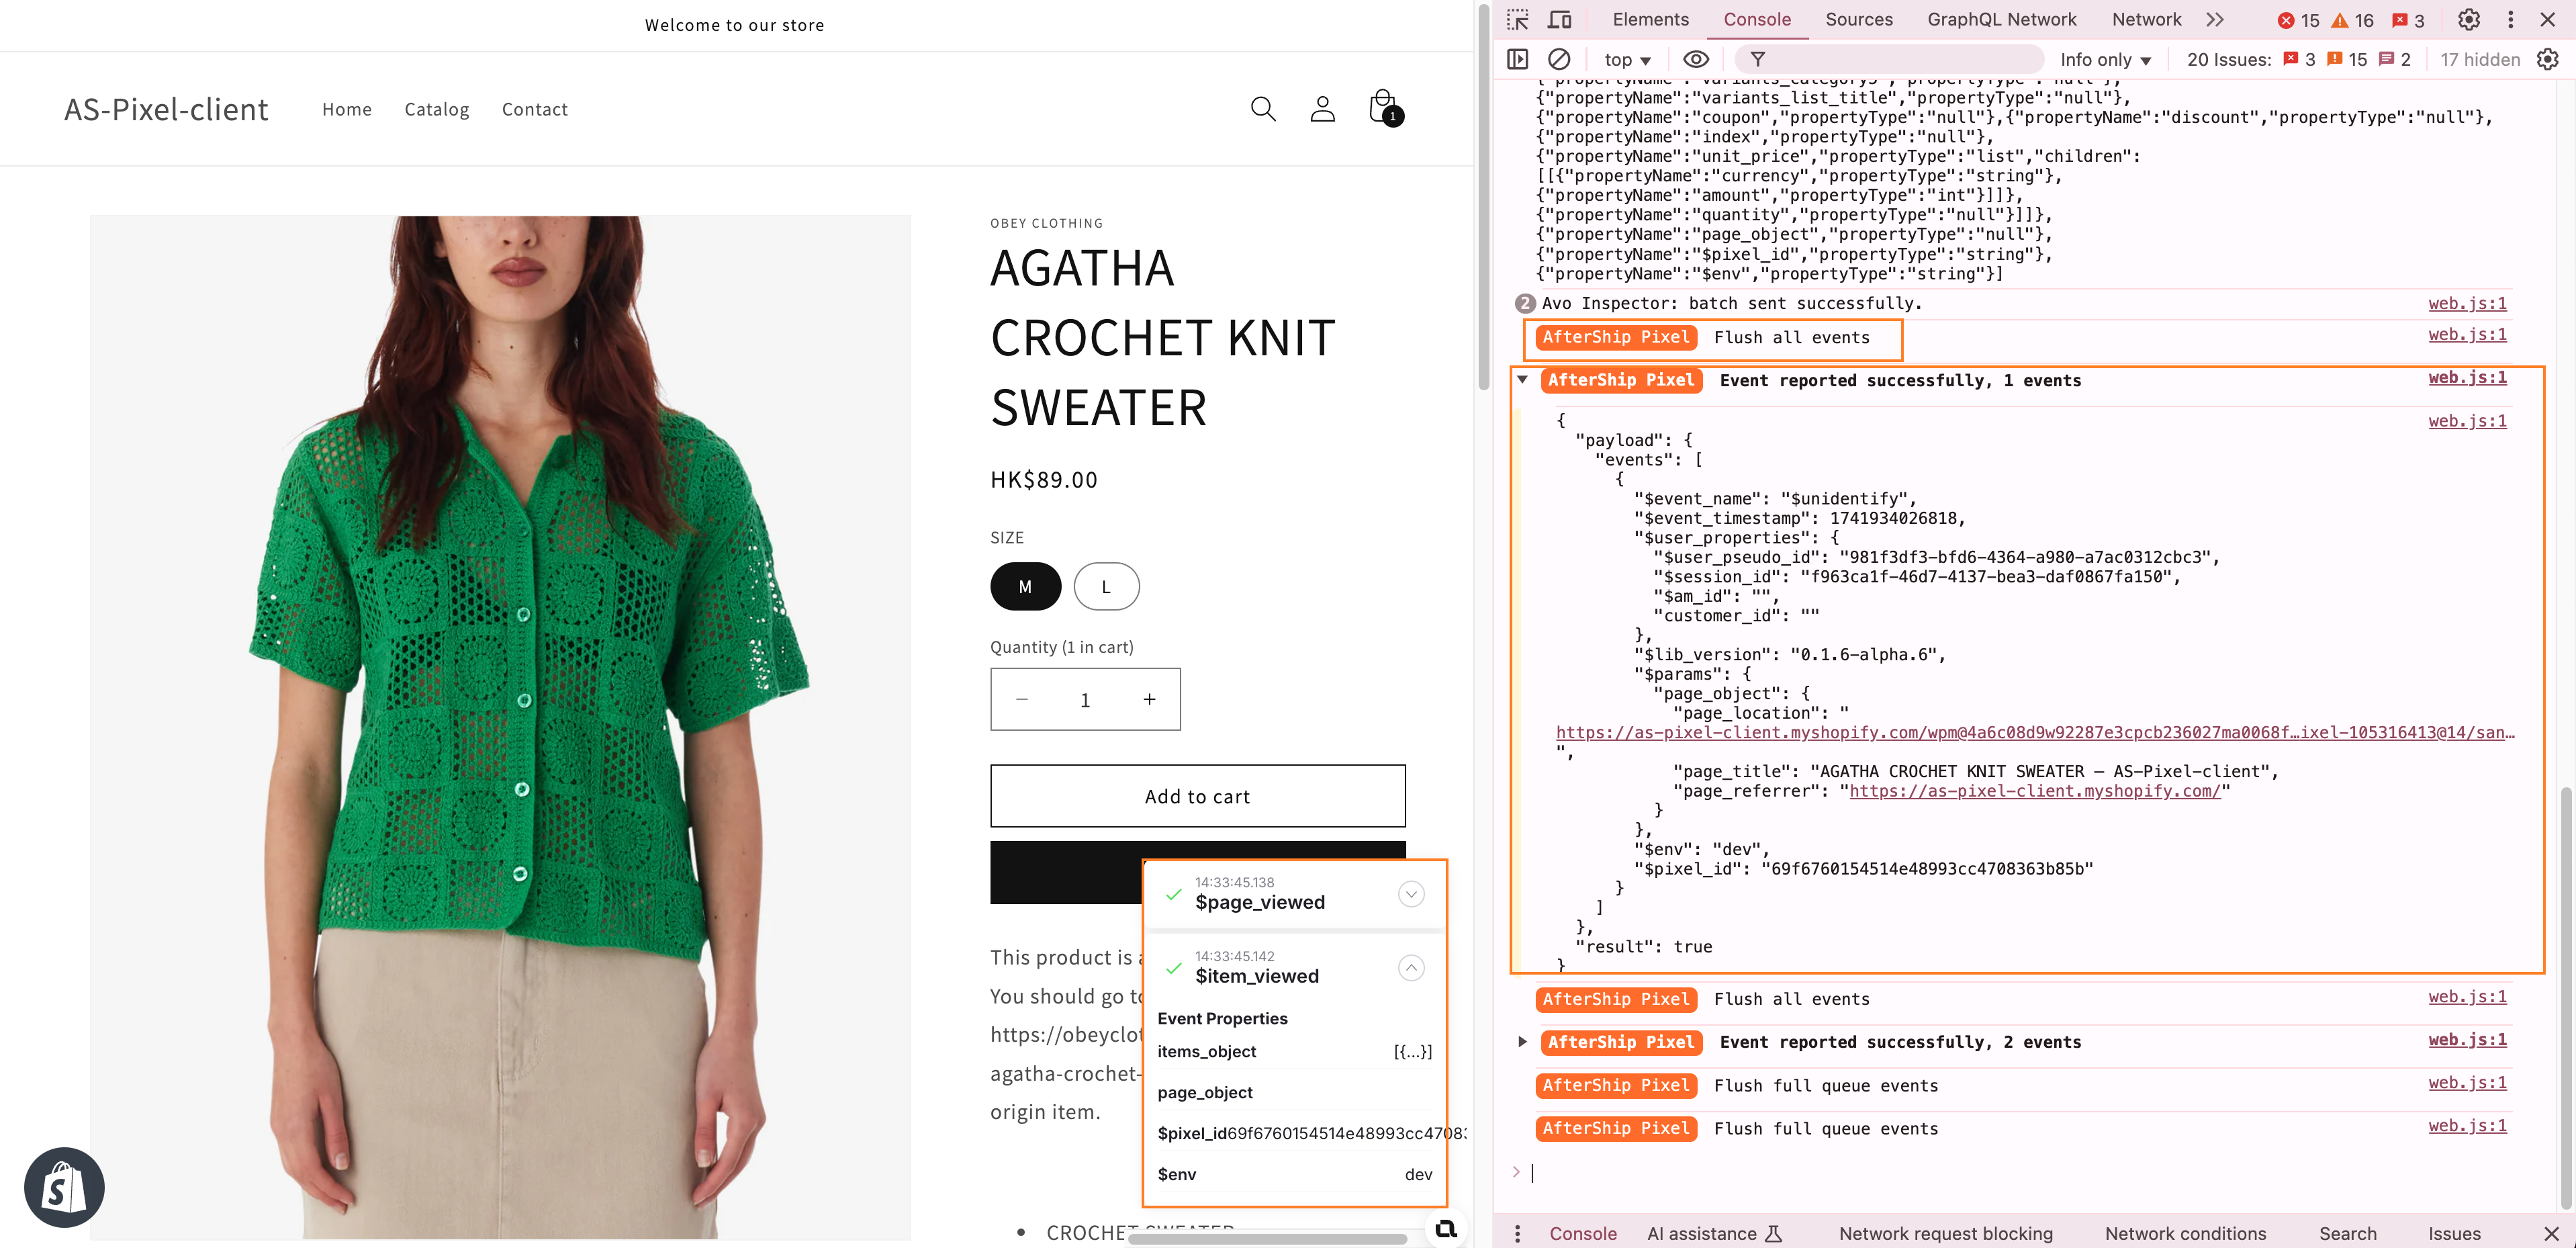
Enabling Debug Mode
Call window.ASPixel.debug(true) in the browser's debug console.
Disabling Debug Mode
(excluding Checkout and Thank you pages): Call window.ASPixel.debug(false) in the browser's debug console.