OAuth 2.0
OAuth is a security protocol designed to provide controlled access to shared resources. It offers an alternative method for securing the Event Webhook. Unlike traditional authentication methods where you have to share your login credentials and grant full access to your account, OAuth provides granular access control by enabling you to specify which resources an application can access. This way, you can authorize an application to perform specific actions on your behalf without compromising the privacy and security of your account. To explore OAuth further, visit the OAuth community site.
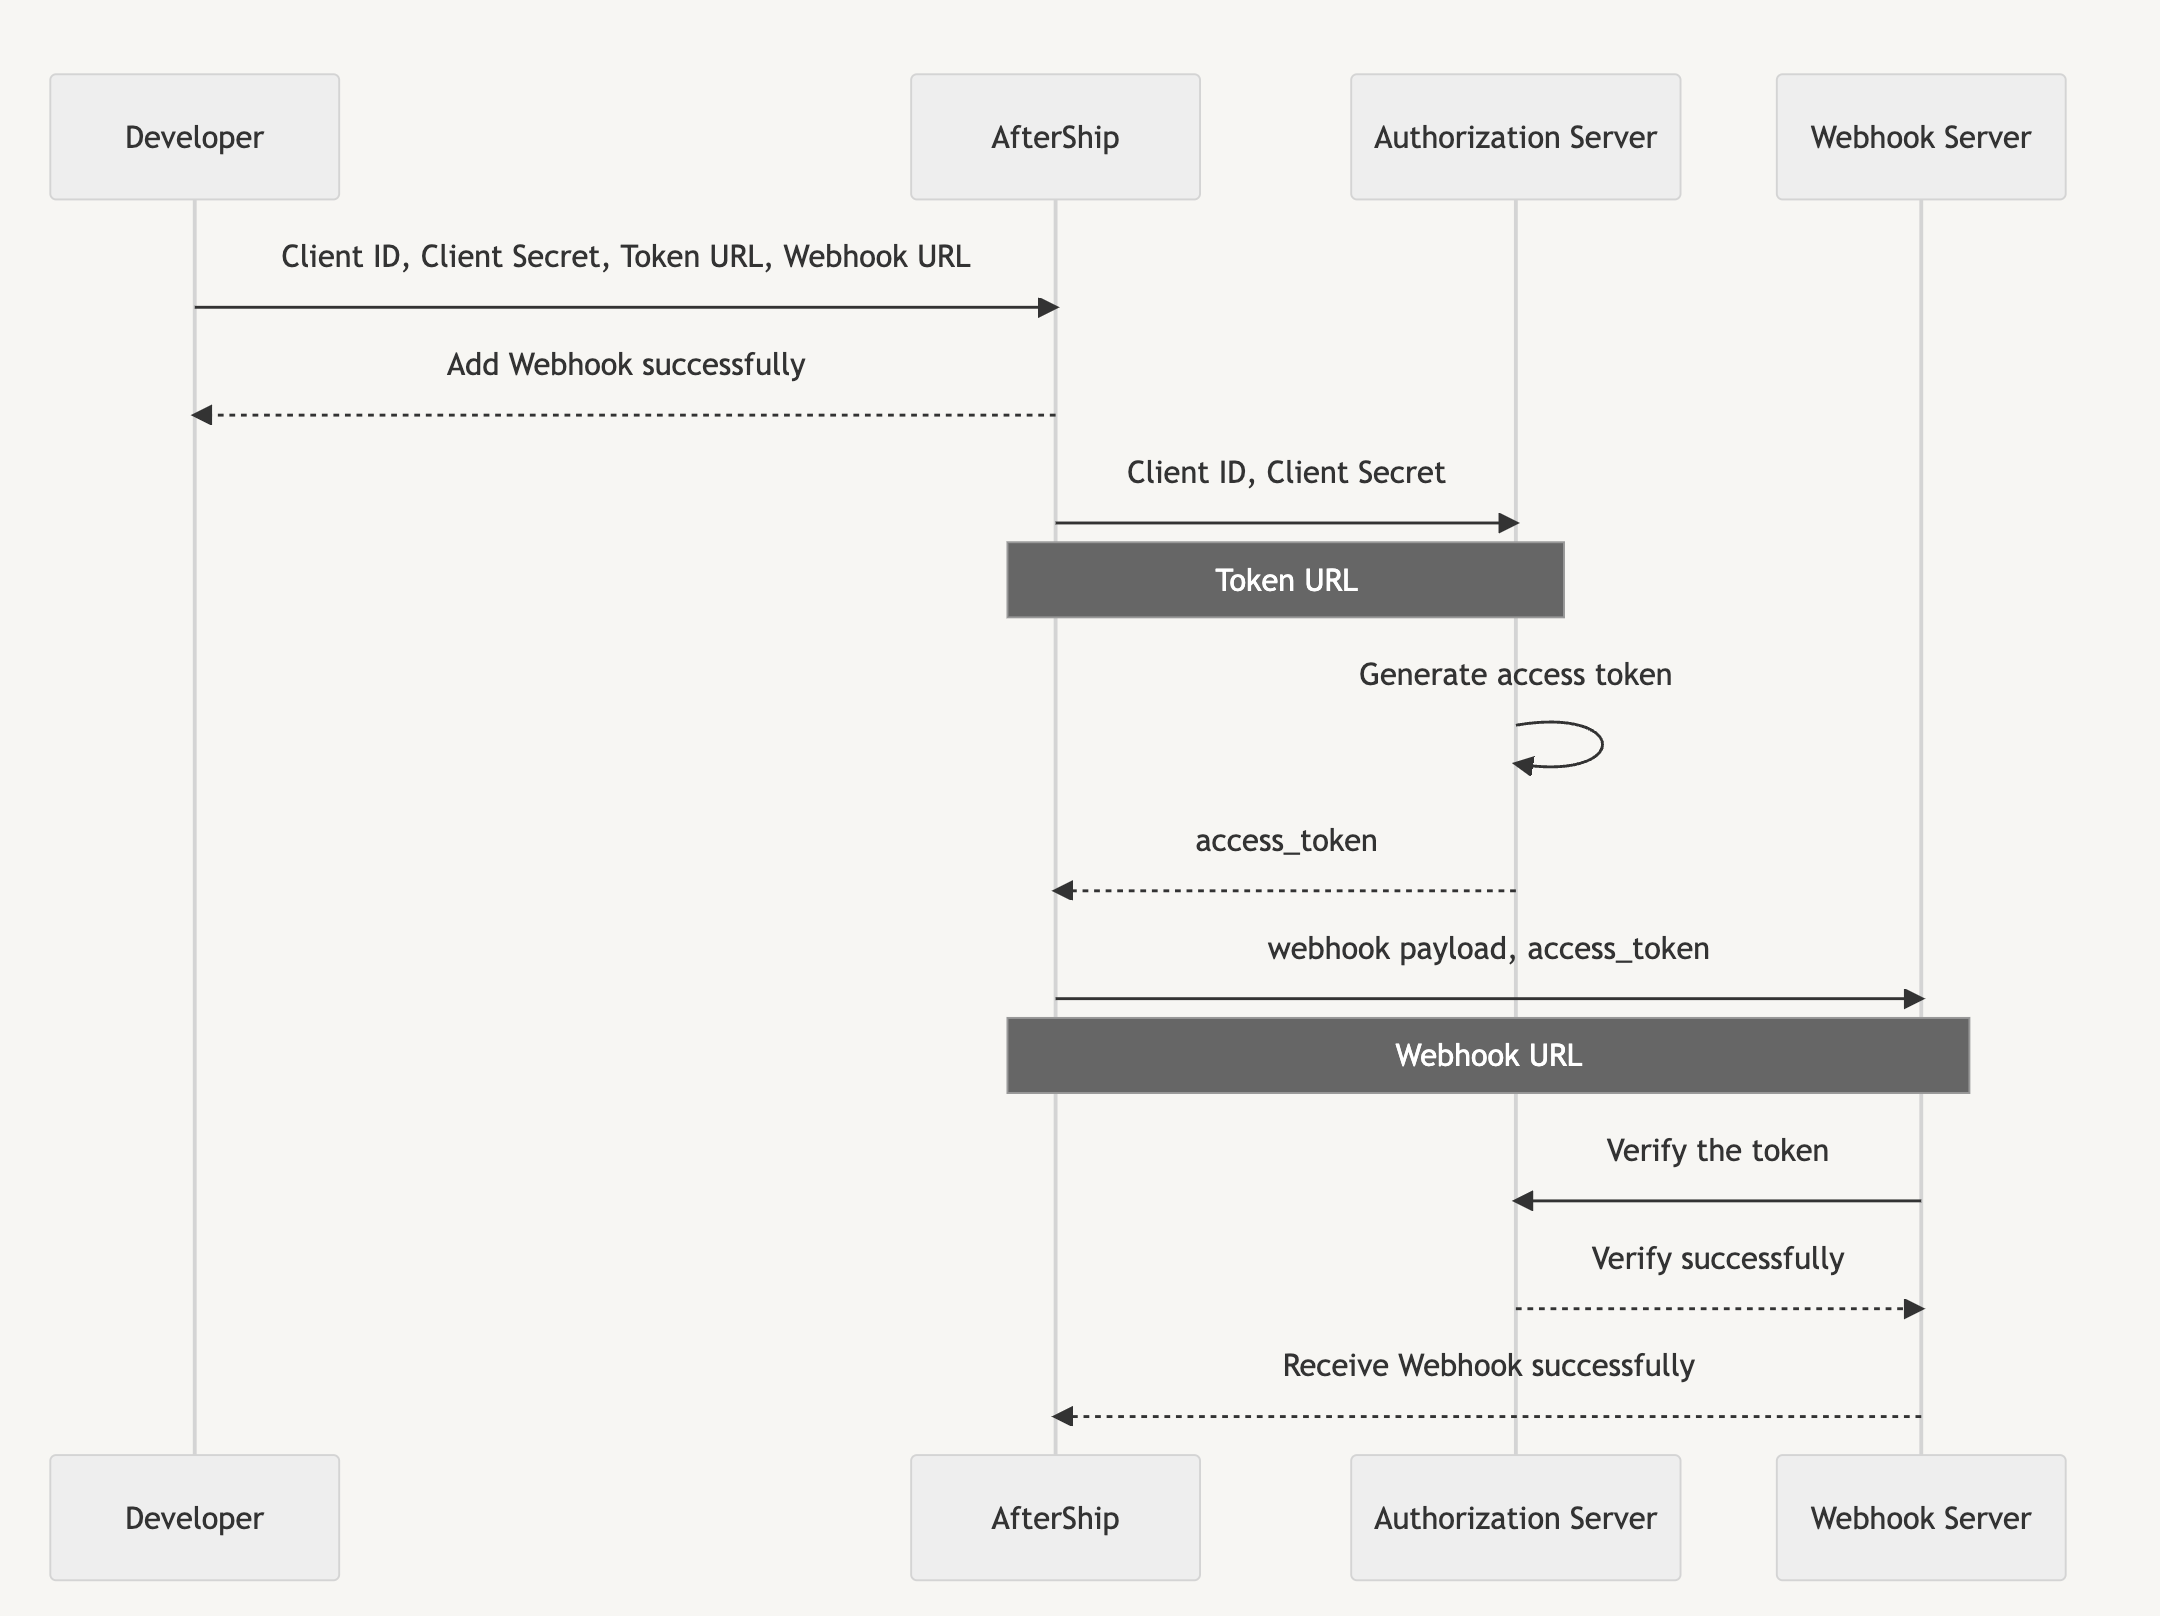
AfterShip Tracking Webhook utilizes the Client Credentials OAuth grant type, which is designed for machine-to-machine communication. This authorization workflow generates an access token that AfterShip can transmit to your application using an Authorization header, enabling you to authenticate the requests from AfterShip.
OAuth Client Credentials flow
To shed more light on the process, we've included a description of the setup procedure below.
- If you have a webhook service that provides an HTTP webhook endpoint URL and you want AfterShip to make POST requests to this URL, it's important to ensure that the requests you receive are actually from AfterShip. To address this, you can implement OAuth.
- To use OAuth, you need to generate a Client ID and Client Secret. You also need to provide two URLs: the Webhook URL to your webhook service and the Token URL to your OAuth service.
- Once you've provided this information to AfterShip, it will pass the Client ID and Client Secret to the Token URL. The OAuth service will then use the Client ID and Client Secret to generate an access token, which will be sent back to AfterShip.
- The access token acts as a key that allows your webhook service at the Webhook URL endpoint to verify that the request is coming from a trusted source. AfterShip will include the access token in an Authorization header when making requests to your Webhook URL.
- As the access token is shared only among your Webhook service, the OAuth service, and AfterShip, you can trust that requests delivered with the access token are from a trusted source. The access token serves as proof that AfterShip has been authorized to make requests on behalf of the user who was granted access.
- To verify the legitimacy of an access token, you can perform a validation check with the OAuth service responsible for its creation. The OAuth service typically offers an API for access token validation, ensuring the request's validity and authorization.
Access Token API Specification
The access token URL must be provided by the below protocol.
Protocol
HTTPS
Method
POST
Request Parameters
| Field Name | Required | Description |
|---|---|---|
| grant_type | YES | "client_credentials" |
| client_id | YES | Required for generating an access token. |
| client_secret | YES | Required for generating an access token. |
| scope | NO | Specified scope of authorization |
Request Sample
Response Body
| Field Name | Required | Description |
|---|---|---|
| access_token | YES | The access token string issued by the OAuth service. |
| token_type | YES | The type of access token, typically just the string "Bearer". |
| expires_in | YES | Duration of time the access token is granted for, if it expires. |
Response Body
Enable OAuth 2.0
- Navigate to Webhook Settings.
- Check the Enable OAuth box to reveal the Client ID, Secret Token, Token URL and Scope fields.
- Fill in the OAuth configuration fields:
- Client ID: Required for generating an access token.
- Client Secret: Required for generating an access token.
- Token URL: The URL where AfterShip should send the Client ID and Client Secret to create an access token. This URL should connect to your OAuth service.
- Scope: Optional. Specified scope of authorization.
With the above steps completed, requests to your POST URL by AfterShip will include the access token in an Authorization header. You can now use this access token to verify requests through your OAuth service.