Integration with Shopify headless store
Special Reporting Scenarios:
Some events, such as checkout started, need to be reported from within Shopify itself, not just the frontend. To capture these events, event listeners need to be added within Shopify itself.
How to add listeners in Shopify:
- Go to the custom event menu and select Add Custom Pixel.
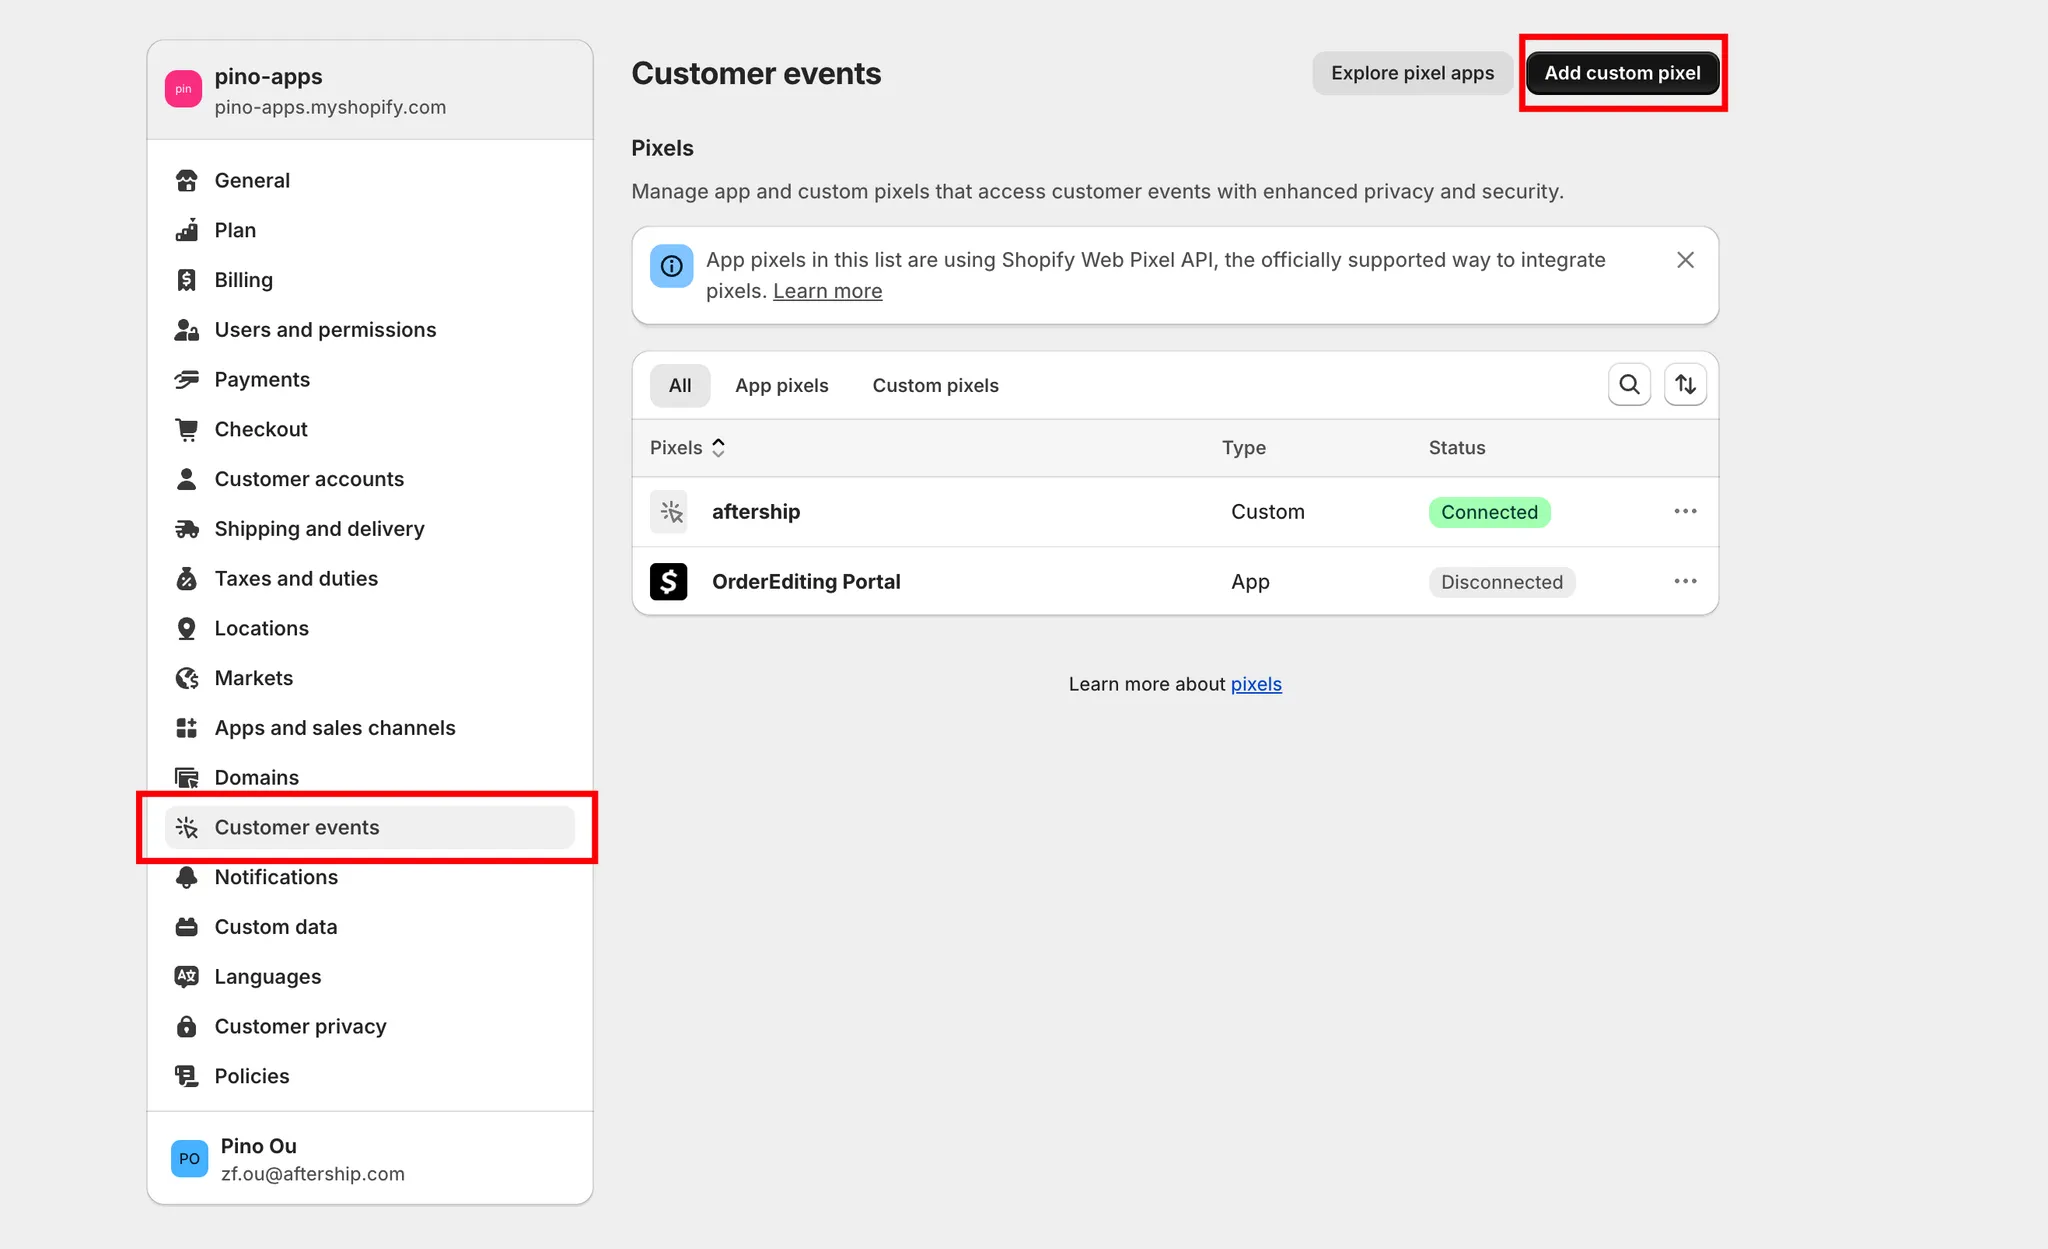
- Initialize the JavaScript Pixel SDK (make sure HTML is excluded from the setup). To obtain the Pixel ID for your Shopify store, refer to the AfterShip Pixels documentation (for merchants). Replace
<AfterShipPixelId>with the Pixel ID you obtained.
<script>
var g = document.createElement('script');g.src = 'https://sdks.aftership-pixel.com/web-pixels/v1/web_script.js';g.async = !0;g.onload = function () {var j = window.methodQueue;window.methodQueue = [];for (var i = 0; i < j.length; i++) {if (j[i].path) {var paths = j[i].path;var target = window.ASPixel;for (var p = 0; p < paths.length - 1; p++) {target = target[paths[p]];}var method = target[paths[paths.length - 1]];method.apply(target, j[i].args || []);}}};document.head.appendChild(g);window.methodQueue = window.methodQueue || [];window.ASPixel =window.ASPixel||new Proxy({},{get: function (b, a) {if (a === 'events') {return new Proxy({},{get: function (_, m) {return function () {window.methodQueue.push({ path: [a, m], args: arguments });};},},);}return function () {window.methodQueue.push({ path: [a], args: arguments });};},},);window.ASPixel.init({ pixelId: "<AfterShipPixelId>" });
</script>
- Subscribe to customer events with analytics.subscribe() and add event tracking:
analytics.subscribe("checkout_started", event => {
    window.ASPixel.events.checkoutStarted({
        currency: event?.data?.checkout?.subtotalPrice.currencyCode,
        totalAmount: event?.data?.checkout?.subtotalPrice?.amount,
        items: event?.data?.checkout?.lineItems?.map?.(item => ({
            variantId: item.id,
            variantTitle: item.title,
            productTitle: item.variant?.product?.title,
            productId: item.variant.product.id,
            unitPrices: [{
                amount: item.finalLinePrice.amount,
                currency: event?.data?.checkout?.subtotalPrice.currencyCode,
            }],
            quantity: item.quantity
        })) || [],
    })
});

analytics.subscribe("checkout_completed", event => {
    window.ASPixel.events.purchaseCompleted({
        orderId: event?.data?.checkout?.order?.id,
        totalAmount: event?.data?.checkout?.subtotalPrice.amount,
        currency: event?.data?.checkout?.subtotalPrice.currencyCode,
        items: event?.data?.checkout?.lineItems?.map?.(item => ({
            variantId: item.id,
            variantTitle: item.title,
            productTitle: item.variant?.product?.title,
            productId: item.variant.product.id,
            unitPrices: [{
                amount: item.finalLinePrice.amount,
                currency: event?.data?.checkout?.subtotalPrice.currencyCode,
            }],
            quantity: item.quantity
        })) || [],
    })
})

analytics.subscribe('page_viewed', (event) => {
    const customer = init.data.customer;
    if (customer) {
        window.ASPixel.identify({
            customerId: customer?.id || ''
        });
    } else {
        window.ASPixel.resetIdentity();
    }
})

analytics.subscribe("all_standard_events", event => {
    console.log(event)
    ...custom logic...
})
Required tracking events for attributed revenue calculation
To accurately track and calculate the revenue attributed to your Branded Tracking Page, the following event triggers must be implemented:
- ASPixel.events.pageViewed()
- ASPixel.events.itemViewed()
- ASPixel.events.itemClicked()
- ASPixel.events.addedToCart()
- ASPixel.events.checkoutStarted()
- ASPixel.events.purchaseCompleted()